How to embed a PLX M300 wideband controller into a stock Mach 460 CD deck
Embedding in the CD Deck:
Since my son is not tuning his car any more, I liberated his PLX M300 wideband O2 sensor for logging with my new Xcal2 in my Cobra. But mounting it in the car so the display can be seen requires a little creativity. So I figured out a way to embed my M300 into a dead 94-98 Mach460 CD deck so the display shows through the CD deck’s display window.
This mod will require a Dremel tool with a cutting wheel for cutting metal.
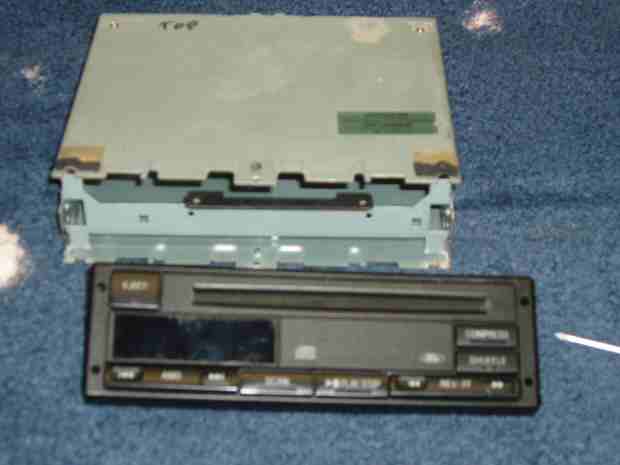
The first step is to get a dead Mach460 CD unit and take it completely apart. This should not be a big problem, since these units die at a young age.
You will first take the front panel off the unit, pull the top and bottom
plates off the chassis. You will want to pull all of the circuit boards and the
disk drive out of the unit. Take the screws out of the two connectors and remove
them. Make sure you save them so you can use my CD Delete how-to to ensure your
radio will still work after you pull the CD out of the circuit. Here are two
pictures of the CD unit taken apart.
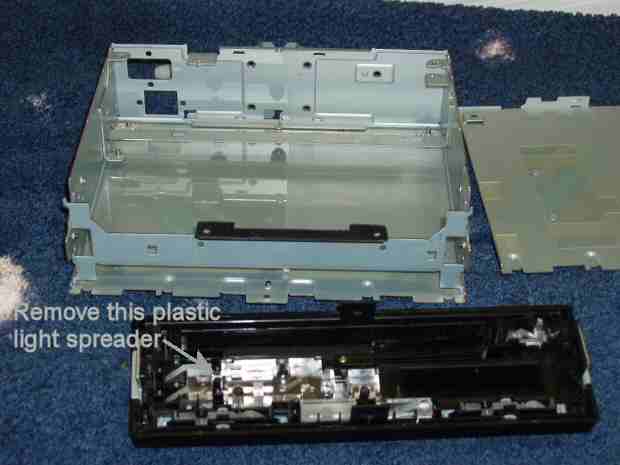
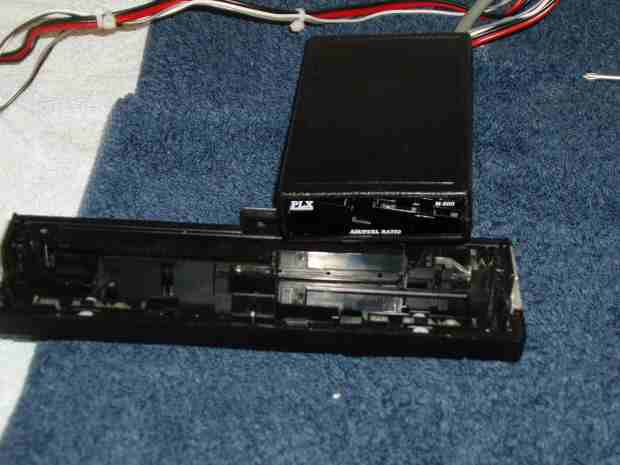
You will need to take the screws out to release the circuit board from the front panel. Pull the plastic light spreader out of the front panel as well. Pull the rectangular metal frame out of the display window and pull the teal plastic color filter out of the display window. This will leave a smoked plastic window for the PLX display to show through. Here is a picture showing the back of the front panel and the M300. You can see that the M300 will fit right into the hole in the front panel.
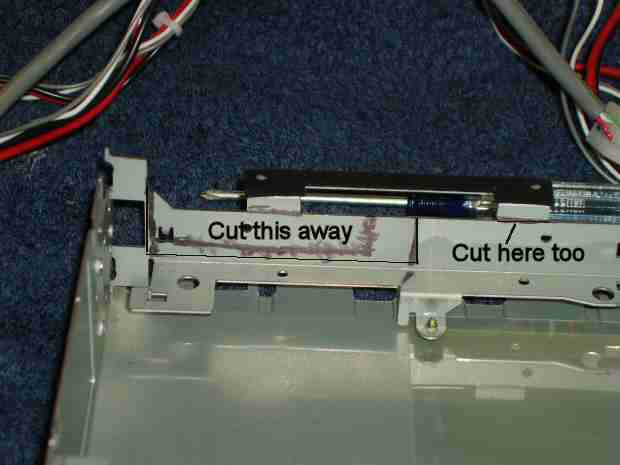
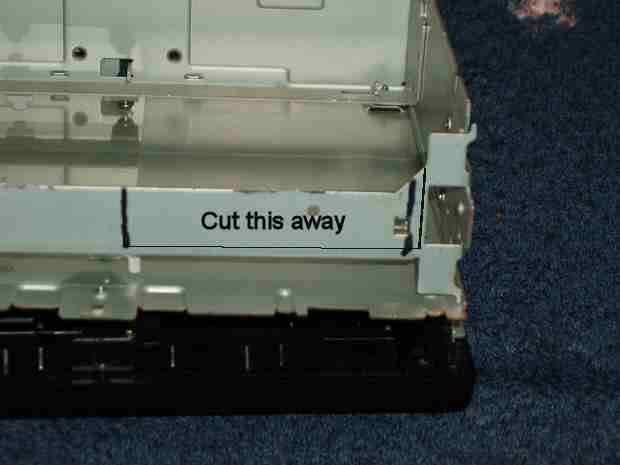
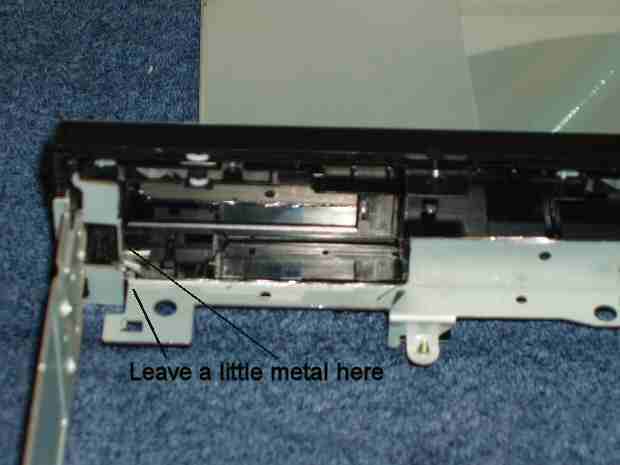
You will need to flip the faceplate upside down on the chassis so the top of
the chassis is the bottom and vice versa. I cut the black metal lip that goes
into the CD slot away so I could mount the front plate on to see where to cut
the metal away to allow the M300 to slide into the front panel behind the
window. You will need to cut close to the edge of the metal bracket that goes
across the front of the chassis. But leave a little bit of metal on the side and
corner so that the chassis has structural integrity. The M300 will fit, barely.
Here are a couple of pictures of where to cut.
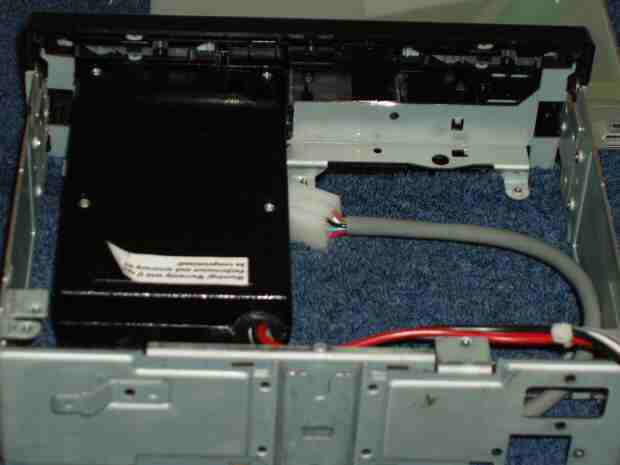
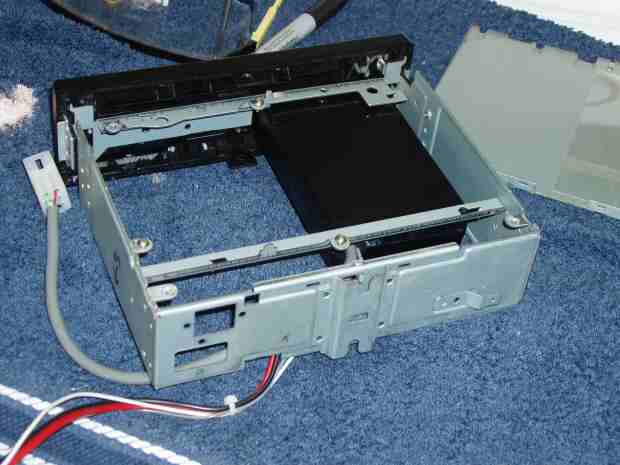
Here is a picture of the chassis cut and the front panel installed.
Here is a test fitting to ensure the M300 will fit into the holes.
Once it was clear it would fit, I powered it up to see of I could see all the digits through the window. I could see them. The digits are red, nothing we can do about that, and they were dimmer than I was used to because the smoked plastic window dims it a bit. I ultimately pulled out the red plastic filter on the front of the PLX M300 controller in order to make it bright enough to see in daylight when installed in the CD deck behind it's filter.
Then I got a piece of Styrofoam that I could cut up to make blocks to hold
the M300 in place. I used a hand jig saw to cut the Styrofoam.
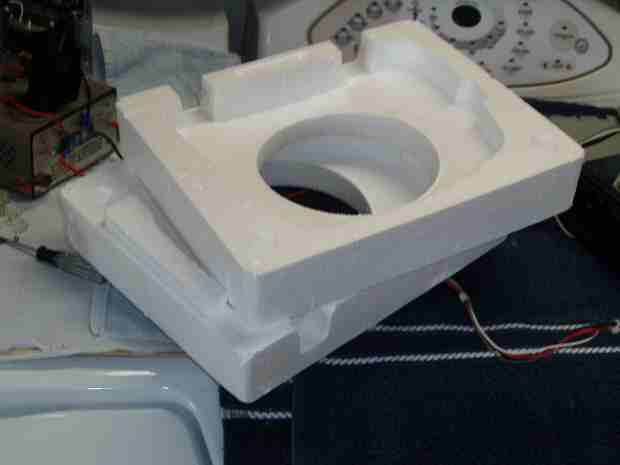
I cut blocks of Styrofoam to fit tightly between the back of the M300 and the
back of the chassis. This will keep the M300 pressed into the window of the CD
deck. I then cut a thinner block of Styrofoam to hold the M300 up off the bottom
of the chassis. I used double sided tape to stick it to the chassis in the right
place.
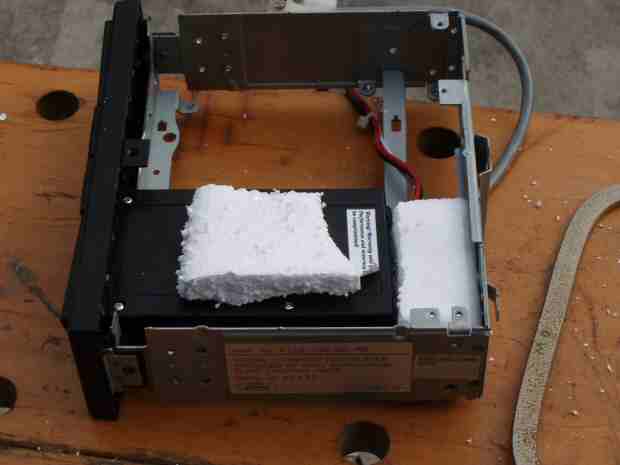
I cut a larger block of Styrofoam to prevent the M300 from falling into the
large vacant side of the chassis. I also ran the wires through a pair of rubber
grommets I put into the connector holes in the chassis. I needed to use a Molex
Pin extractor to pull the pins out of the M300 Molex connector to get it to go
through the grommet. Remember to write down which color wire goes into which
hole in the connector so you can put it back together correctly.
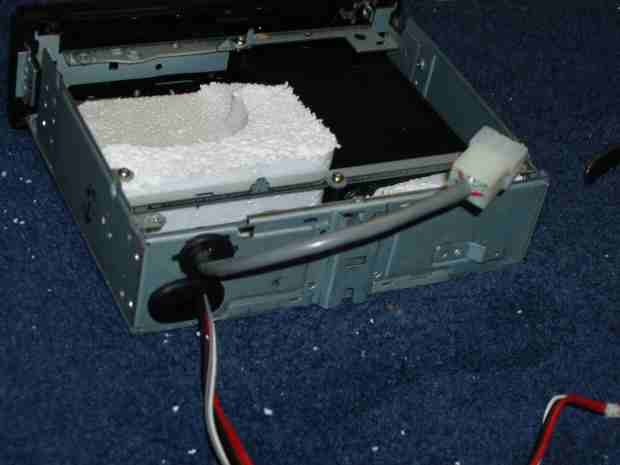
Later, I decided to replace the large piece of syrofoam with a shortened toilet paper tube for holding the M300 in place from the side in order to allow more air for cooling of the device. I used double sided sticky tape to hold the tube in place.
I put the top panel back on and I am done.
Installation:
I was able to tap into the "hot in start and run" power by using the power connection my car alarm uses, so it was easy to power the WB.
I replaced the driver's side front stock narrowband O2 sensor with the wideband Bosch unit. I wired the narrowband output of the M300 back to the O2 connector in the stock harness using a connector from an old O2 sensor. With the PLX unit, the O2 signal is wired to the black wire of a stock O2 sensor connector, and the grey wire from that connector is wired to the O2 sensor return ground back to the M300. I installed a 1K Ohm, 1/4 watt resistor across the two white wires to simulate the heater to prevent a MIL light. PLX documentation says that it should be a 20 ohm, 10 watt resistor, but 1 K ohms works for Honda computers, so I am running an experiment to see if 1K works for Mustangs as well. Unfortunately, I'm getting a P0155, bad O2 sensor code, so it looks like I'll have to put in the 20 ohm resistor after things cool down. ***EDIT*** The 20 ohm, 10W resistor seems to work great, no codes.
The PLX unit is nice because it is self calibrating.
The wideband signal from the M300 goes to the Analog 1 input of the SCT Xcal2 analog cable for datalogging per SCT instructions.
Here is what the unit looks like in the car.
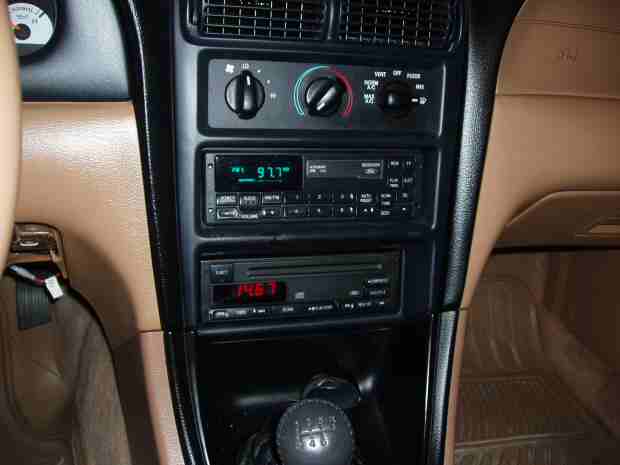
And a high resolution picture:
